H.265 or High Efficiency Video Coding (HEVC) is the latest generation video compression standard which compresses a video file into smaller package, making it easier to store or transmit. Today is the turn of HEVC. However, many devices and applications like QuickTime player are still need time to support the new codec. Do you have some HEVC/H.265 files saved on your computer, and wonder how to make H.265 files playable in QuickTime player on Mac OS Sierra/El Capitan? You’ve come to the right place.
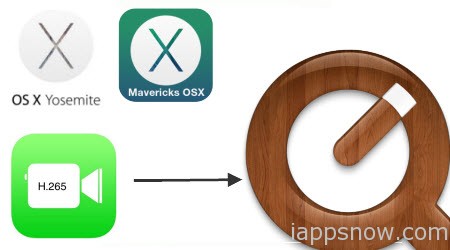
Since QT player can work with H.264 MP4, MOV, M4V videos well, to get H.265 files playable in QuickTime Player, a quick fix is to convert H.265 to QT Player readable format for playback easily.
One of the best Yosemite/Mavericks H.265 Converter from the market so far is Pavtube iMedia Converter for Mac, which is recentlyupgraded to support H.265 encoding and decoding and it can be taken as a completely professional H.265/HEVC encoder, decoder, player and editor.
With it, you can convert H.265 to QuickTime player friendly H.264 MP4, MOV, M4V video on Mac OS Sierra/El Capitan with quality loss effortlessly. And it is available to customize the output resolutions to any size the users want and edit video file with trim, crop, add watermark, insert subtitles, split, merge and other options before conversion. What’s more, it also supports convert non-H.265 video files to H.265 for storage and playback. Download the program and move on to see how to convert H.265 videos for QuickTime player on Mac OS Sierra/El Capitan .
Download H.265 to QuickTime player converter:

Tutorial: Converting H.265/HEVC to QuickTime player friendly format
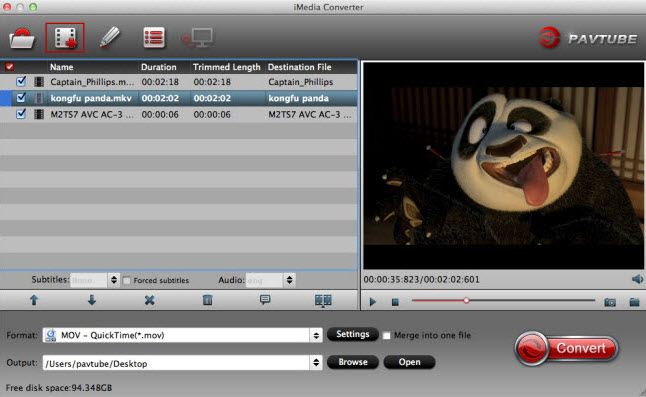
Step 1. Add H.265 source
Install and run this best H.265 Video Converter. Click add button to import the H.265 files to the program.
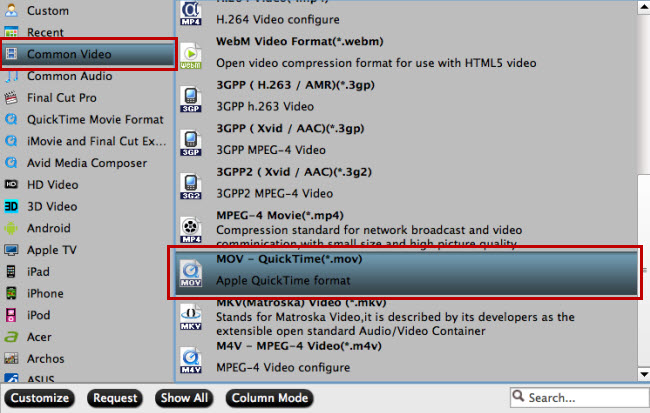
Step 2. Choose QuickTime Player friendly format
Click the Format menu, select QuickTime Player friendly format as your output video format. There, you can take H.264 MP4, M4V, MOV as your output video format.
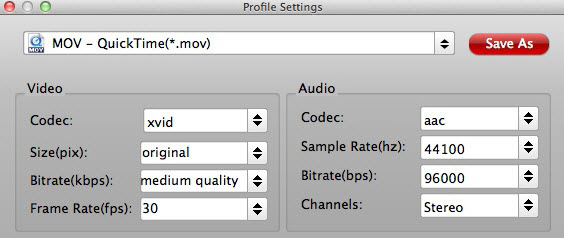
Tip: In case the default settings do not fit your requirement, you can click “Settings” button and enter “Profile Settings” panel to adjust video size, bit rate, frame rate, sample rate and audio channels.
Step 3. Start conversion
Finally click the Convert button to begin encoding H.265 to QuickTime player format.
After the short conversion, go to the output folder and drop the converted files into QuickTime player. Once all this is done, add your converted videos to QuickTime player.
Additional Tip:
Want to find another solution to play H.265(HEVC) videos? Just get the best QuickTime Alternative for Yosemite/Mavericks.
Here is a list of the top 2 options:
1. DivX Player
DivX player is another robust HEVC video file player. It is an award winning software that offers HEVC playback. It offers high-quality playback of movies, TV shows. It supports almost all the popular formats like AVI, DIVX, MKV, MP4 and more. By using its DivX Media Server one can stream music, video and photos to any DLNA-compatible device at home like PS3, XBOX, or Samsung Galaxy line of product. With the Stream To feature in player user can also control which device they can stream their videos to.
2. VLC Media Player
Another player that can play HEVC file is the VLC Media Player, which is a free and open source player and framework. It supports a wide range of multimedia files. It can also play DVDs and various streaming protocols.
Now you can experience the H.265/HEVC videos on your QuickTime Player on Mac OS Sierra/El Capitan freely!
Continue Reading:
Encode Blu-ray to H.265 MP4 | Play H.265/HEVC on Mac
Play H.265/HEVC to PS4 | Play H.265 on LG TV
Edit H.265/HEVC with FCP X | Edit H.265/HEVC in Premiere Pro
HEVC H.265 Encoder for NVIDIA GPU | Encode H.265 with FFMPEG


